Sunday, 14 August 2016

SURPRISING THINGS TO ADD TO YOUR BATH TO DETOX YOUR BODY

Our bodies are subjected to so many toxins everyday you can help rid your body of some of these toxins by simply having a bath! There are loads of different things you can add to your bath to detox your body.

Detox baths benefits to name a few :
  • Help support your immune system 
  • Flush out toxins
  • Relax your body and mind
  • Soothe aching muscles and joints
  • Boost endorphins
  • Support lymphatic drainage 
Detoxing can also come with some more unpleasant flu like symptoms like fatigue and breakouts (I personally haven't experienced these) however this is a sign that the detoxing process is working!!

Here are some ingredients you can add to your bath and effects they can have:
Epsom Salt - ease muscles and joints/improve circulation/allows skin to absorb minerals

Green Tea - anti ageing/detoxing 

Bentonite Clay - remove heavy metals and toxins from body/ smooth skin 

Lemon (sliced) - remove toxins/tighten pores/revive skin

Ginger - ease cold and flu symptoms/help with respiratory problems/muscle relief  

Baking soda - calm body and mind/relieve irritation/sooth skin/regulate P.H levels 
(Aluminium free)

Apple Cider Vinegar - anti-inflammatory properties/balance P.H levels 

Hydrogen peroxide - oxygenate blood/help rid the body of disease 

Lavender - stress relief/calm body and mind/muscle relief     

Himalayan Salt pain relief/reduce acidity in the body/anti-inflammatory properties/balance P.H levels/relaxation 

You can mix up some of these ingredients and make your own detox bath concoction.


Detox bath tips:

Drink water before having a detox bath the hot water can be very dehydrating for your body drink some water before bathing to keep your fluids up.

Dry brush your skin before your detox bath this is another form of detoxing and it helps unclog pores and rid your body of dead skin cells, allowing the detoxing effects of your bath to penetrate your skin better. - If you haven't heard of dry brushing before or don't know how to dry brush your skin then check out my post on Why And How You Should Dry Brush Your Skin

Pick the right time of day for your bath, allow your self time to relax and enough time for your detox bath to work its magic.

Have the water as hot as comfortable as this encourages sweating out toxins and impurities from your body.

Bathe for a 20 - 40 minutes (20 minutes is the minimum recommended time for a detox bath)

Set a relaxing atmosphere. Why not light a few candles or use some aromatherapy oils to help de-stress you during your detox.

DO NOT FALL ASLEEP (if your prone to falling asleep in the bath maybe forget the candles)

Keep an eye on the time or maybe set a timer to make sure you've at least reached your 20 minutes of bathing.


Get out of your bath nice and slowly, a hot bath can really take it out of you so when your getting out take it easy and avoid the head rush.

Have you ever tried any of these ingredients in your bath before?
Share:

Monday, 18 July 2016

HENLEY ROYAL REGATTA WITH CHINAWHITE AND SOME BLOGGING BABES

This was my first year at Henley Regatta and to be totally honest I'd never heard of it before I was invited! Once I secretly googled it to see what it was I thought it sounded like a lovely day and theres no way I could miss it.

The night before Henley Regatta I stayed up in Reading with a beautiful bunch of bloggers that I've met at previous events - Lauren/ Blonde Vision  Jessica/ Jessica KG Charlotte/Vanity Fairest Rachel/ Rachel Tries Life Laura/That Girl Behind The Mask Fran/Franny Mac Jenny/Dream In Pink

We had a chilled evening with a romantic pizza dinner (ha) and girly chat. In the morning it was all systems go with 5 girls getting ready together, we each had our own make up stations and our inner blogger didn't allow us to do this without trying out each others make up and practically giving a product review on everything we own. Once we were all ready it was time for a few cheeky selfies and a glass of prosecco before we got our taxi to Henley.
We took a picnic with us which mainly consisted of chocolate, crisps and more prosecco (obvs). The sausage rolls didn't make it past the journey there. After eating we then watched a few races go by before heading to the Chinawhite enclosure.
Thankfully the weather stayed nice for us, had we have gone the day after it would have been a total different story! Although it was nice weather I soon regretted wearing a backless dress and not bringing a coat out with me. ( Thank you Rachel for lending me your cardigan you lifesaver! )
On to Chinawhite...
So unfortunately the pictures don't do it justice but Chinawhite had a large marquee equipped with seating areas a bar and dance floor, outdoor seating areas, a food hut and the poshest portaloos I've ever used! 

In the first few hours at the Chinawhite enclosure was the at atmosphere was chilled everyone was just socialising and drinking and in the later hours many more people joined the party and everyone was on the dance floor. The music was so good all night and its fair to say we were all so sad when it came to home time, we all wanted to carry on partying the night away. 

I honestly had the best day with the amazing girls and I cannot wait for next year, Chinawhites we will be back!!
Checklist for next year:
Coat! (even though its nice in the day it can be chilly in the night)
Impressive Picnic (our crisps and chocolate didn't quite match up to the extravagant effort gone to by some and left me trekking in heels for the nearest burger)
Picnic Blanket (trying to fit 8 girls on one picnic table was not easy)
Camera (iphone pictures just don't cut it)

Apologies for the iPhone pictures I was unable to take my camera out with me.
                           Here a short vlog of our day at henley again filmed on the iPhone.

Share:

Saturday, 25 June 2016

ANTI-GRAVITY YOGA

Ive been going to Anti-gravity Yoga also know as Aerial Yoga all in all for about 6 months and I love it! I really wanted to exercise more as I started driving last year and was feeling the difference in my
level of fitness. I hate jogging and exercising from home, I find it so boring and I just cant seem to force myself to do it but growing up doing dance classes here there and everywhere I liked the idea of exercise classes. 

Originally I looked into pole fitness classes and that's when I found My Gravity Fitness, they do pole, aerial hoop, aerial yoga and other fitness classes. The classes sounded super interesting so I signed straight up. 

Anti gravity yoga is now one of my favourite exercise classes ever! Using a hammock you are able to do yoga poses in the air, upside down or use it to help with poses on the ground. Not only is anti gravity yoga a interesting and fun way to exercise it comes with a bunch of overall health benefits scroll down to find out what they are ...
Here are some benefits of antigravity yoga listed on the My Gravity Fitness website:
  • Zero compression inversions
  • Circulatory and lymphatic system refresh
  • Stimulating the release of neurotransmitters from the brain.
  • Decompression of spine through gentle traction
  • Hydration of vertebral disks.
  • Increased muscular flexibility
  • Core strengthening
  • Upper and lower body muscular strengthening
  • Increased kinesthetic awareness; Fine-tuning balance & agility
  • More astute proprioceptor (sensory receptors) response
  • Increased joint mobility
  • Low impact cardiovascular conditioning.
  • Increased command/response acuity.
  • Greater cerebellum function
  • Increased Neuromuscular plasticity.
  • Hormone stimulation.
  • Self-esteem enhancement through conquering basic fears.
  • More astute presence through mindful consciousness conditioning.
  • Learning of new skills: A creative and artistic fitness experience.
  • Uniquely fun experience that works risible muscles as well as functional muscles.

Anti-gravity yoga is a total body workout almost all body parts are used to move and stretch, your muscles are toned and redefined and your joints are regenerated and strengthened.Yoga is also a great way to de-stress and clear your mind.

My Experience
In my first lesson of anti-gravity yoga I was told that I may feel dizzy and light headed from the inversions (hanging upside down) as my body is not used to it and that this is normal. This was never really a problem for me I think I got head rush like twice from swinging back up to quick but hey I get head rush getting up off the sofa! haha

Hanging upside down can feel a little strange the first few times but you can pull your self up at any moment and go at your own pace, no need to feel the pressure of the other people in the class! This is something I soon got used to and now feels totally normal.

Some of the moves can look daunting and feel scary when first trying them but they're are so surprisingly less scary than they look! The hammock makes you feel secure in every move. I remember being really scared to roll forward out of a move in the air and when I did it I couldn't believe how un-scary it was (yes i am making up my own words) and I felt a real sense of achievement, I just wanted to do it again and again.

At the beginning and end of each class you lie in your hammock and the person teaching the class will gently give you a push and get your hammock swinging, this is where you wind down for the class and relax after the class. When I first did this in my first anti-gravity yoga class I was amazed it was sooo relaxing much more so than lying on the floor in a regular yoga class!

All in all I love anti-gravity yoga and I thought its a really cool thing to share with you guys! So how many of you will I be seeing next week? haha

Heres a video of some of the things we get up to in anti-gravity yoga

You can check out My Gravity Fitness on facebook here 

If your into yoga you need to give aerial yoga a try I guarantee you'll love it.

Have you heard on anti-gravity yoga before?
Would you try anti-gravity yoga?


Share:

Friday, 27 May 2016

HEALTHY 3 INGREDIENT PANCAKES 2 WAYS

Pancakes are my favourite breakfast option. I used to use ready made pancake mixes that you just add water and eggs to, but these are not healthy at all so I decided to start making my own healthier mix as I love pancakes so much and cannot live without them. 

These are the 3 ingredients I use in my healthy pancake mix, Wholemeal Flour, Unsweetened Almond Milk and Egg whites. ( no added surgar/salt ect like regular pre made pancake mixes)  
I use wholemeal flour as it has some health benefits like being high in fibre and containing vitamins ect as appose to bleached white flour. I use Almond milk as its 100% plant based and has health benefits such as maintaining a healthy heart and skin. I use egg whites only as they are bursting with protein and dont have the high cholesterol (LDL) content of the yolks. 
First im going to take you through the few easy steps of making the pancakes and then explore how they can be enjoyed.
So first you add your egg whites to your blender cup if you have one if not then a jug will do fine.
Then add your wholemeal flour. I now just guess the amount by eye and then add milk accordingly. Obviously the more flour you add the more milk you'll need and more pancakes the mix will make. The amount I used on this occasion I poured into a small jug before adding it to my mix and it was roughly 8oz and made 3 pankcakes. 
Next you add your milk, I never measure out my milk as the amount I will need will vary everytime. I add a little milk to the mix then stir will a fork and keep doing this in small amounts until the mix reaches the consistency I want. I have always found the amount of water or milk that the regular batter mix sachets tell you to use make the mixture super runny and make either really thin pancakes or pancakes that are gooey in the middle so I have always made my mixes much thicker. I choose to have my mixture fairly thick as I find it cooks better, you can get a thicker pancake with no gooey centre.
Now blend the mixture to get a smooth mix without any lumps of flour. If you don't have a blender then a whisk or fork will do fine - it just requires more effort.
Once your mix is blended nicely heat a flat based frying pan on a medium heat with a small dash of oil for a minute or two. Then pour a small amount of the mix (i also do this by eye)  roughly 1/3 of a regular sized mug into the centre of the pan and then using the handle of the pan gently and slowly swirl the mix around the pan to level out the mix. You can now lower your heat a little and leave your pancake to cook for a minute or 2. Once you see that no parts of the pancake are no longer runny you can get a spatula and flip your pancake over to cook the other side. I don't recommend flipping your pancake in the air unless your a pro if your like me this will have a 98% fail rate.
Once your pancake is cooked properly on both sides place it on a plate.  Repeat the same process for as many pancakes as you would like.

Now the fun part.. choosing what you want to fill your pancakes with. Theres are loads of options but my two ways are Naughty (a delicious treat) or Nice (a healthy option) you can mix and match these ingredients up however you like but here are some of my top ingredients and the option they come under.

Naughty                or                   Nice 
 Nutella                                       Honey
Crushed Malteasers                   Chia Seeds/Flaxseed
 Maple Cyrup                              Choice of-
                                                      Strawberries, Bluberries, Banana 

I always have chia seeds or flaxseed in my pancakes as for me its a great way to include these in my diet and my usual choice is honey and fruit but sometimes I mix the naughty with nice and have a added little bit of Nutella. 
What are your favourite ingredients to put in a pancake?
Share:

Sunday, 22 May 2016

A ALL NATURAL WAY TO MOISTURISE YOUR SKIN

I found Dames and Dimes and asked if they would like to send me product to try out. The product I chose was this Whipped Body Butter. What attracted me to Dames and Dimes was that their products are all handmade, high quality, natural products containing NO synthetic colours, NO synthetic fragrances and NO parabens. As you'll know if you read my blog I harp on about how important our skin is being the biggest organ of our body, and how we quite often neglect it. Another fab thing to do for your skin is Dry Brushing check out my post about that here 
Dames and Dime's Whipped Body Butter is made with organic unrefined african shea butter. It has a consistency almost the same as coconut oil as when you touch it it starts to melt. It also feels more like a oil as appose to a moisturiser which to be honest I prefer, if you have dry skin like me moisturiser lasts two seconds on my skin before I need more, I found the butters effects fairly long lasting. Another thing I found because of the consistency is that a little of this butter goes a long way.
The only kind of downside to this butter (but then it is'nt really a downside) is that the smell is a very natural earthy smell but that's how it should smell! This product is natural at the end of the day and if you want to reap the benefits of natural products then these luxuries we've become accustomed too such as fancy smells are not too much to compromise are they? 

Although this butter is not fragranced it doesn't have a strong smell so you don't smell it once its applied. The ideal time to apply this butter I think would be straight out of the bath/shower when your skin needs a little hydration and I'd advise letting it sink in before putting on clothes. 

As Dames and Dimes products are natural they are suitable for sensitive skin. If your into your healthy alternative options then give these guys ago. 


Share:

Monday, 16 May 2016

20 STRESS RELIEVING ACTIVITIES

Stress can get in the way of everything and it can even make you ill. Everyone experiences stress in their life one way or another and it's unfortunately normal but it's also important to at least try to minimise the stress in your life. Here are some stress relieving activities you could try
  1. Go for a walk (try to clear your mind
  2. Call a good friend (for a giggle or vent)
  3. Take a long bath (add some relaxing bath oils)
  4. Listen to relaxing music (even whilst working if you can)
  5. Do yoga (even if its just 15 minutes)
  6. Play games (card games/board games/on your phone)
  7. Keep a Diary (could be talking about your day or feelings)
  8. Get a massage (if no one at home can give you one treat yourself!)
  9. Read a Book (choose something you really enjoy or a light hearted, funny, inspirational book) 
  10. Meditate (you can get apps on your phone that help you meditate but be sure to turn it off)
  11. Try some Art Therapy ( draw something or invest in a art therapy book like this one)
  12. Have a clear out (clear room = clear mind clear outs always feel great)
  13. Take a nap ( sometimes you just need to sleep it off)
  14. Listen to a audio book or podcast
  15. Have a foot bath ( add some epsom salts to detox your body and boost magnesium levels)
  16. Use a stress ball (if you have access to a punch bag even better let it out!)
  17. Try aromatherapy 
  18. Have lunch with yourself (get some you time away from everyone and everything)
  19. Rearrange your room ( i always like to change up my surrounding from time to time and the process can be calming)
  20. Have a laugh (Watch a comedy or funny you tube videos
What do you do to de-stress?
Share:

Tuesday, 10 May 2016

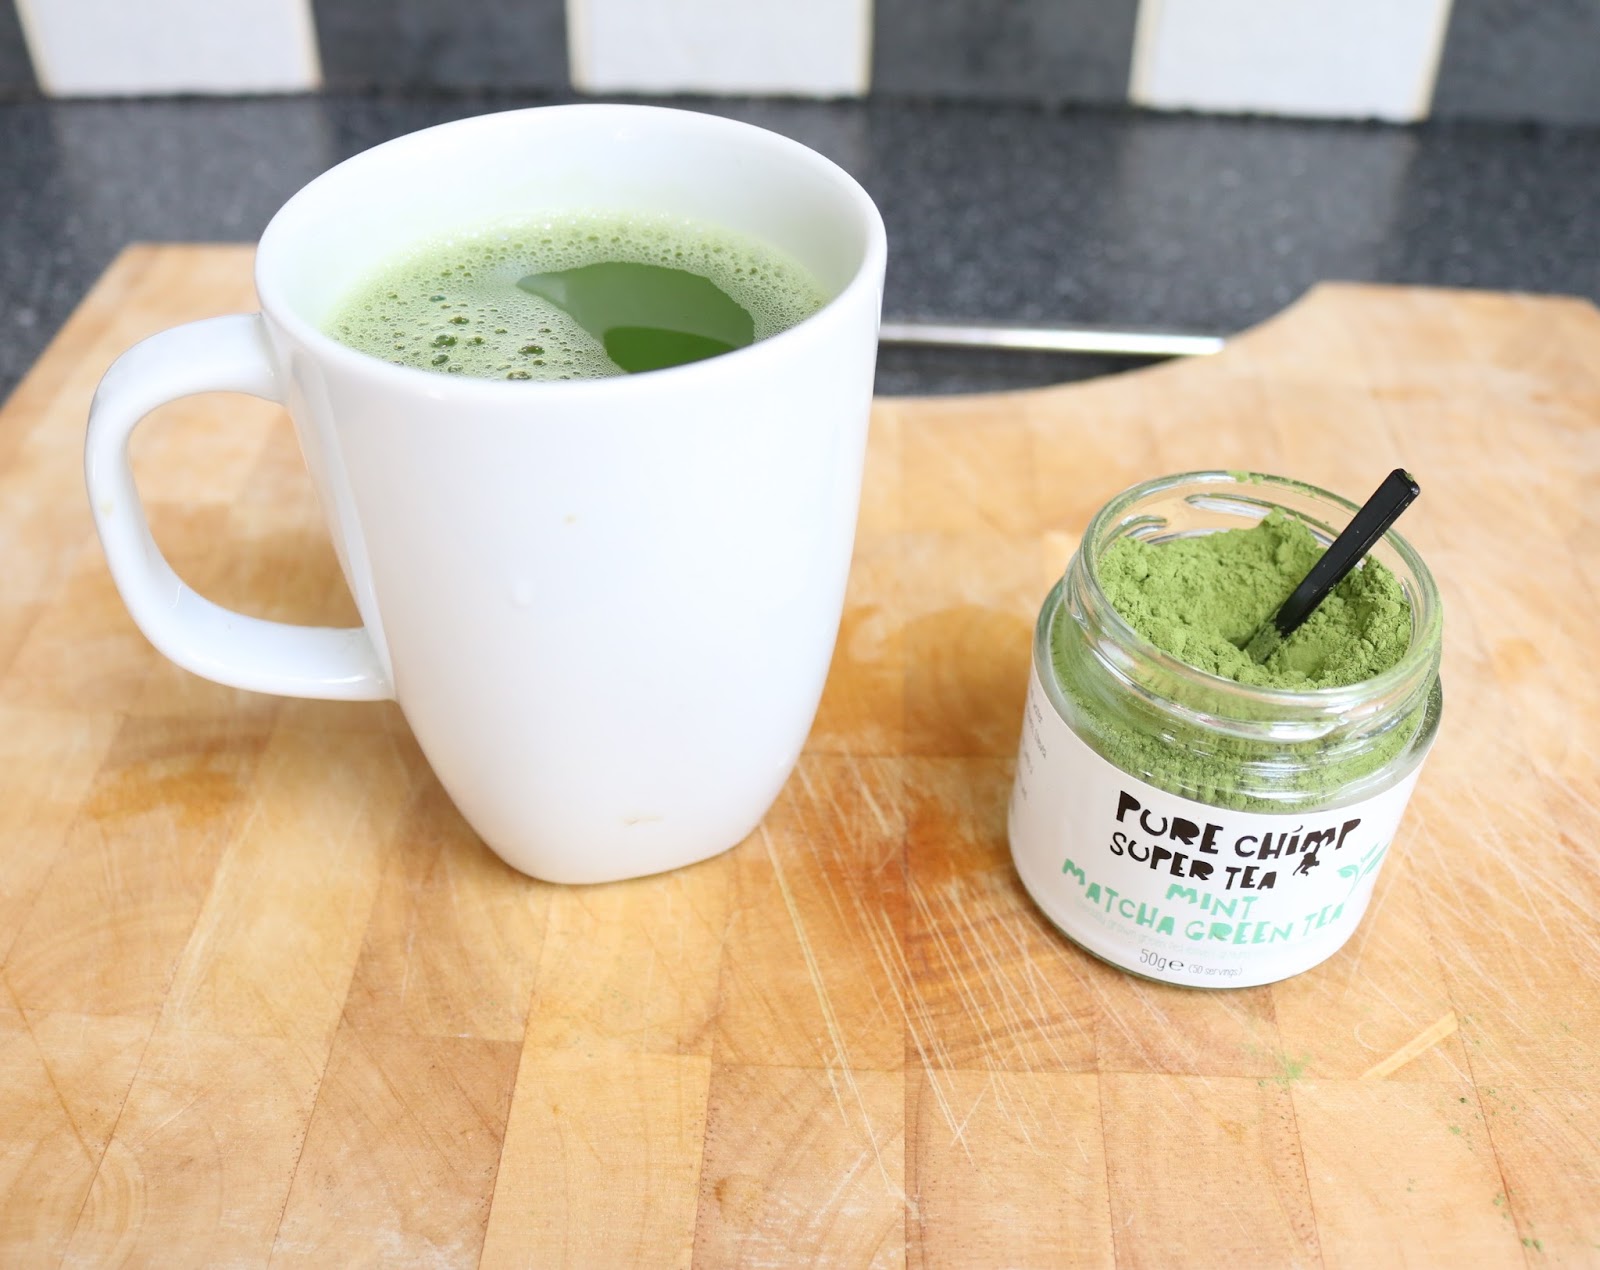
HOW TO MAKE TRADITIONAL MATCHA GREEN TEA WITH PURE CHIMP

If you didn't already know I'm a huge lover of Matcha and Green Tea. Matcha tea is a form of green tea, with green tea you infuse the leaves in water and then strain and discard them. Matcha tea is the whole leaf that has been dried and ground down into a fine powder. Matcha tea is said to have 10 X more more goodness and antioxidant power than green tea. Matcha is well known for its fat-burning capabilities, cancer preventing powers and mental stimulation and clarity. 


(Above is a graph from Pure Chimp website comparing antioxidants in Match Tea with superfoods)

I was so pleased to be gifted by Pure Chimp to try out their Mint Matcha Green Tea. Pure Chimp sell a small variety of Matcha Tea as well as some skincare products and gift boxes. They do a 100% natural Super skin cleanser which sounds really interesting you can check that out here

I chose to try out their Mint Matcha Tea as it sounded like a interesting twist on regular Matcha Tea. Their Mint Flavoured Matcha is much sweeter than regular Matcha. I liked the taste of their tea however I would say I prefer just plain regular Matcha tea. I think thats down to drinking it so often that I've become accustomed to its bitter taste. I know most people also find Matcha/Green tea quite bitter and like to sweeten it up if thats you, I'd say this is tea is perfect for you. I found Pure Chimp's tea of great quality and I love that it comes with a perfect sized little scoop. Im nearly out of my tea already! I think ill be going for their regular Matcha Tea next.  

Heres how to make traditional Matcha Tea
First sift the specified amount of matcha powder through a small sifter into a bowl. The pure chimp matcha powder comes with a scoop I usually add one whole scoop. If no scoop or measurements are provided use 1/2 - 1 tsp of match powder depending on how strong you like your tea.
Next add a small amount of your hot water (preferably just below the boil) to the bowl just enough to make a thick paste, ensure all powder has been mixed in well with the water and try to get rid of any lumps of powder.
Then add the rest of your hot water to the bowl and use your bamboo whisk in zigzag motion as appose to circular to whisk the tea vigorously until frothy. I think traditionally Matcha is drank as a smaller amount of stronger tea than the everyday sized mugs we use today for our teas but you can choose how diluted you'd like to drink it. I personally make just a little less than a mug sized amount of Matcha tea. If you do not have a bamboo whisk you can whisk the tea by any means you like.
If were going all out traditional then enjoy your tea straight from the bowl alternatively transfer the tea into a mug.
If you like your tea a little sweeter then add a teaspoon of honey and mix well

Are you a lover of Matcha/Green tea like me? 

Share:

Tuesday, 26 April 2016

WHY & HOW YOU SHOULD DRY BRUSH YOUR SKIN


Dry Brushing is literally brushing your skin with a dry bristle brush. Why? ... Our skin is our largest organ I for one forget this all the time. 1/3 of our body's toxins are excreted through the skin, dry brushing helps to unclog your pores and get rid of toxins that become trapped in the skin along with some added benefits....

1. Stimulates your lymphatic system
dry brushing your skin can stimulate your lymphatic system. Your lymphatic system plays a major role in your body's immune system. Without going into the whole anatomy of it, stimulating your lymphatic system helps it to release toxins. For a in depth description of what your lymphatic system does for your body visit here but be sure to come back and read the rest of this post! 

2.Exfoliation
Dry brushing removes dead skin cells and lets your skin breatheeeeee

3.Increase circulation 
Dry Brushing your skin can also increase your circulation which also encourages the elimination of metabolic waste (really harmful stuff)

4.Reduce cellulite
So according to certain studies dry brushing can soften hard fat deposits below the skin while distributing fat deposits more easily and in turn help in reducing the appearance of cellulite. (If that isn't reason enough to start dry brushing I don't know what is) 

5.Stress relief
The act of dry brushing has been described as meditative. It may also reduce and muscle tension and can be seen as a light body massage.

How to Dry Brush your skin effectively 
Use a non synthetic/nylon bristle brush preferably with a long handle so you can reach your back but if not you can always ask for a helping hand.
You can dry brush your skin at any point in the day although in the morning is a good time as it has been said to boost energy and leave you feeling more energised. Also before showering is a good time to brush so you can wash of any loose dead skin cells or toxins.
Start with the soles of your feet working your way up the body using upward strokes towards your heart as this best for your circulation and lymphatic system. After doing your lower body move on to your hands and arms again working towards your heart then brush your back and abdomen using clockwise motion (to follow the movement of the colon), chest and neck.
You should avoid your face as your facial skin is much more delicate that the body's (also your bits and bobs)After brushing your skin may be pink or tingly so don't panic however its shouldn't be painful at all if so you probably brushing too hard.

Have you heard of dry brushing before? Have you tried dry brushing?


Share:
© ROBYN SAMANTHA | All rights reserved.
Blogger Template Designed by pipdig