I could not live with out fake tan (first world probs) I wear it literally everyday.
I'm naturally quite fair skinned and having a tan just seems to make everything look better (well in my opinion). So as I've used it for many years and I'm qualified in spray tanning i thought id share with out my top tanning tips and also my favourite tanning products as I've tried literally all there is to try out there.

My Top Tanning Tips:
For All Types Of Tan
Shake the bottle before use-
Make sure your tan is well mixed so you dont end up with funny colours or patches
Ensure all deodorant is removed before application-
You could end up with green armpits and lines showing where your deodorant has been applied, i have learned this the hard way.
Shave the day before hand (or at least a few hours before tanning)-
If you shave just before hand its likely you will get little spots of tan in the pores of your leg hairs no one likes spotty legs. You could shave after your tan has developed (providing its a developing tan) however shaving can cause alot of the tan to come off on your legs so you may end up with legs slightly lighter than the rest of your body.
Exfoliate before tanning
Try to exfoliate the day before hand or at least a few hour before hand. Pay particular attention to your knees, elbows, under arms, hair line and ankles these bits are prone to being dry and gathering tan they're the first places to start to go patchy exfoliating removes the dead skin cells and the chances of this happening.
Wear a tanning mitt with a latex glove underneath
A mitt gives a even finish to the tan it does so better than just a latex glove, however i always use a latex glove underneath as using the mitts alone usually give you tan hands! If you cant get your hands on a tanning mitt you could use a clean old sock the thicker the better!
Ask for help with tanning your back or use a self tan back applicator
The cheap and cheerful way to ensure u have a even tan and get to the hard to reach places is to ask for help maybe from a partner or friend or member of your family. If your unable or do not wish to ask for help you can use a self tan back applicator (will be linked below)
Apply tan to your mitt/glove first
applying to your mitt/glove first allows you to get the right amount of tan before applying it. if your squirt too much tan out you can always wipe it off your mitt or glove however wiping it off your body may cause problems with a even application.
Wipe your Nails after applying your tan
Your nails (hand and feet) will react to the DHA in fake tan and turn a discoloured browny orangey colour. Wiping them clean after minimises the risk of this.
Make sure your skin is not wet from water or moisturiser
This may stop the tan from developing properly in these areas, water may also cause streaks.
Dont use oil/ oily products on your skin before or after tanning
Oil is tans arch nemesis it blocks tan from developing if applied before tan and fades tan when applied once tanned.
Avoid over tanning your hand and feet
A lot of people make this mistake use a little bit of tan for these areas and bend your knuckles when applying tan to your hands also get in between your fingers and toes as this is usually where patches occur. Never tan the palms of your hands tan is like super developy (yes i did just create that word) on the palms of your hands.
When showering wash just the bits that matter
When showering off your tan and showering in the time that you want your tan to remain full of colour try to "get in and get the job done" dont hang around singing into a shampoo bottle the longer your in there the more time that tan has to fade. also try to just apply soap to the bits that matter i call these your "Pits and Bits" which is your armpits and intimate area ( i also include my feet)
Bend your elbows and knees when applying tan to them
If you dont bend your elbows and knees when you apply tan to them you may end up with lines of untanned skin where your skin gathers together this is a ultimate tanning fail
Apply small amounts at a time
By applying small amounts at a time you allow yourself adequate time to work that tan into the skin and get a even finish you can always keep applying more tan to get a darker colour however removing too much tan that has been applied is much more tricky and you can find yourself in a right kafuffle!
For Developing Tan
Moisturise dry areas 10 minutes before application using oil free moisturiser
By moisturising these areas the tan is less likely to go patchy during the time you are tanned. using a oil free moisturiser means there is no oil in your skin to block the tan from developing properly. Ensure all your moisturiser has be absorbed and your skin is not wet before apply tan.
Use talc if your worried about your tan transferring onto clothing
in emergency cases when you have to tan last minute and your wearing something that your worried about the tan transferring onto your clothes you can pat it down with a little talcum powder.
Avoid washing up or brushing your teeth in the tan development time
washing up will wash off your tan from your hands (obvs) and brushing your teeth may give you that awful ring of white around your mouth, not pretty! my advise is dont think oh ill just be really careful brushing i have tried and failed at this also and was left with a line down my chin from my mouth.
For Moisturising Gradual Tan
Apply in a sequence from bottom to top
As you cant see where you've put your moisturising tan on its best to do it in a sequence i start from the bottom to the top using circular motions
Go over the places you've tanned with your hands
Once ive tanned i go over the places ive put my tan on usually my whole body and with my gloves just massage the moisturiser in more to ensure ive got a even coverage.
For Tanning Mousse
Work fast
Mousse dries the quickest out of all the tans when its applied to skin so you have to run it in quikly ensuring your using circular motions.
Use small amounts of tan when applying
It is most important to use small amounts of tan when applying mousse as it dries much quicker you have less time to work it into your skin. Having too much can mean some serious streaking
For Instant Tan
Do washing up and brush your teeth before tanning
just like all other types of tan its best to avoid washing up or brushing your teeth as your instant tan will be able to streak during the duration you are tanned its best to do these two things before tanning and in fact any other activity that involves water!
Use moisturiser to clear up mistakes
If you get a even application of instant tan in one your a lucky thing! you may find you have a slight patch or too much tan in one area just use a little oil free moisturiser and rub it in to patch up these mistakes you may find you want to mix a little moisturiser and tan together in your hand before applying to your skin. Use a little bit at a time as you can always add more as you go along.
Check the weather
I advise you to check the weather before wearing instant tan all together. make sure you dont find yourself stuck in the rain with instant tan on and no umbrella or clothes to cover up all of your skin as you will become a human dalmatian and no one needs that kind of humiliation.
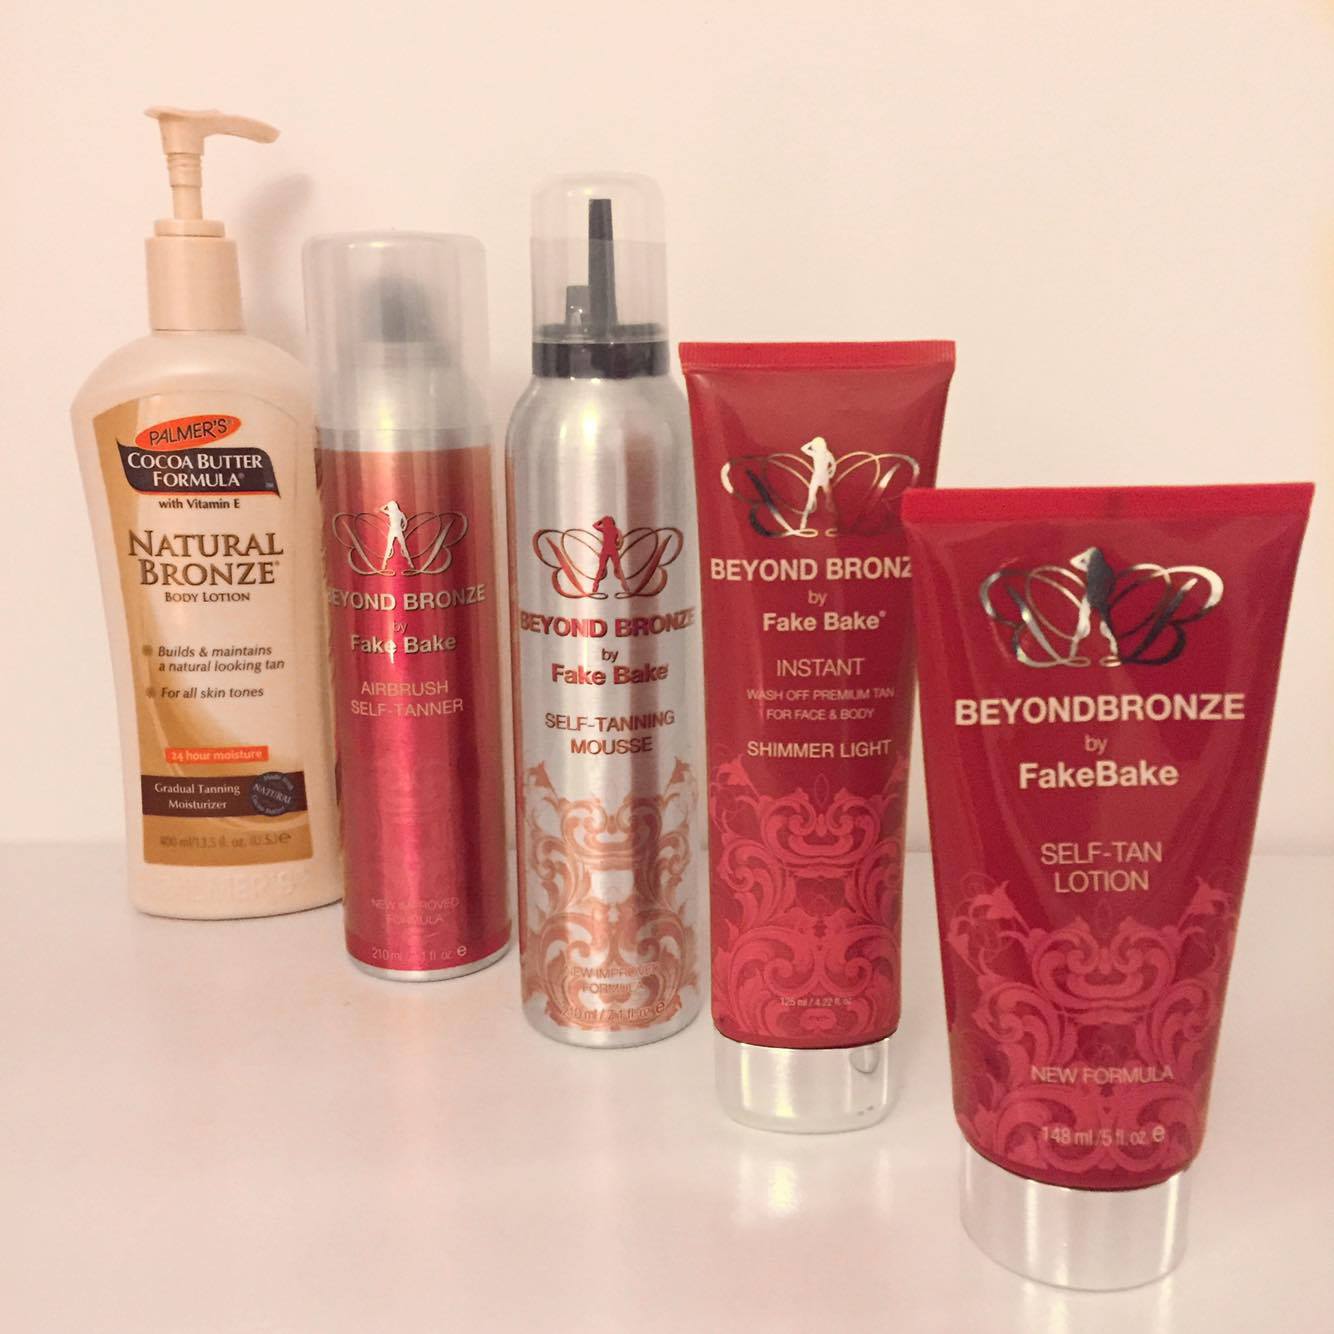
You can shop all my favourite tanning products here ...
This is my favourite moisturising tan and i use it as my everyday tan i find this one is the least streaky/patchy that ive used. Ive also used others that have given me more of a orangey colour i prefer the colour this one gives me. Also a lot of gradual tans take a good 3 days to build up a half decent tan. if you need a deeper tan in a shorter time you can apply a layer of this and then wait until dry and apply another it should give you some pretty good results compared to the other gradual tans out there.
I love all fake bake products they in my opinion give the best colour I love a brown natural looking tan I dont really like orangey tans Fake Bake will not let you down on colour!
This tan is a "show where it goes" tan so you will be able to see where your applying it to. After application you will be a little tanned however this tan develops over a few hours for best results sleep in this tan and wash off in the morning. This bottle has a 360 degrees nozzle.
Shake before each spray and wipe the nozzle before and after each application
Although this tan is in a handy spray bottle I would advise you to have your glove and mitt either to hand or on your other hand not using the spray bottle. If you spray a little too close or too much you may just need a little dab of the mitt.
Best to use this in a bathroom or toilet as spray will get on to objects surrounding you try standing in the bath, shower or sitting on a towel. Make sure room is well ventilated.
This is another "shows where it goes" tan that aslo develops with time. This will provide a deep tan when applied but it will also develop a little so you will need to wash off the little excess tan. This tan should last about 5 days when applied correctly.
Must use gloves with this tan and a mitt is highly recommended.
Shake until you cant hear the liquid moving inside anymore before each squirt.
This tan is fairly similar to a instant tan it gives full instant colour and works into the skin the same as a instant tan lotion, however this tan does develop onto the skin and a night time application is recommended. You may get a little tan wash off in the shower but you will be left with a lovely bronze tan you can deepen this tan but applying everyday until you have your desired colour.
Please Note: pictured is the tan in shimmer light I would recommend Matte Medium (they also do Matte Light) The link is to matte medium.
This tan gives a lovely brown tan you can achieve a deeper tan by putting on another layer once the first layer is dry it is better to apply two light coats as appose to one thick coat. This tan completely washes off leaving your skin untanned.
Gloves are a must with this tan and a mitt is highly recommended
Fake Bake's oils free moisturiser is great its exactly what its intended for and you can use this while tanned if your skin is getting a little dry and it should help to maintain your tan evenly.
Some people may find this a little pricey for moisturiser and id agree you can get cheaper oil free moisturisers such as this Nivea one.
Self-Tanning Tool For Back/Hard To Reach Areas
You can also pick on of these up from boots however they are just a little more expensive,
and can i just say what a great invention.
Hope youve all enjoyed this post and found it helpful.


